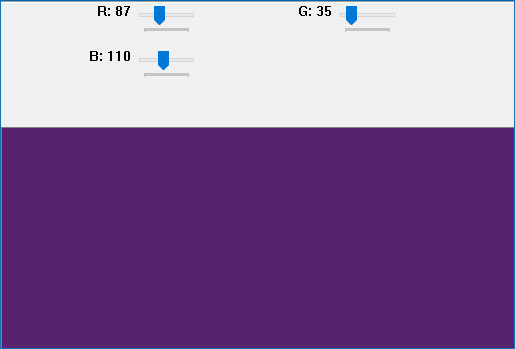
番外篇:滑动条

学习使用滑动条动态调整参数。图片等可到文末引用处下载。
滑动条的使用
首先我们需要创建一个滑动条,如cv2.createTrackbar('R','image',0,255,call_back),其中
- 参数 1:滑动条的名称
- 参数 2:所在窗口的名称
- 参数 3:当前的值
- 参数 4:最大值
- 参数 5:回调函数名称,回调函数默认有一个表示当前值的参数
创建好之后,可以在回调函数中获取滑动条的值,也可以用:cv2.getTrackbarPos()得到,其中,参数 1 是滑动条的名称,参数 2 是窗口的名称。
RGB 调色板
下面我们实现一个 RGB 的调色板,理解下滑动条的用法:
import cv2
import numpy as np

# 回调函数,x 表示滑块的位置,本例暂不使用
def nothing(x):
    pass

img = np.zeros((300, 512, 3), np.uint8)
cv2.namedWindow('image')

# 创建 RGB 三个滑动条
cv2.createTrackbar('R', 'image', 0, 255, nothing)
cv2.createTrackbar('G', 'image', 0, 255, nothing)
cv2.createTrackbar('B', 'image', 0, 255, nothing)

while(True):
    cv2.imshow('image', img)
    if cv2.waitKey(1) == 27:
        break

    # 获取滑块的值
    r = cv2.getTrackbarPos('R', 'image')
    g = cv2.getTrackbarPos('G', 'image')
    b = cv2.getTrackbarPos('B', 'image')
    # 设定 img 的颜色
    img[:] = [b, g, r]

小结
cv2.createTrackbar()用来创建滑动条,可以在回调函数中或使用cv2.getTrackbarPos()得到滑块的位置